Most gas grill spec sheets are written by the marketing department, and the biggest number on the page is the least useful one. BTU tells you how much fuel the burners can consume. It says nothing about whether the left side of your grate runs noticeably hotter than the right, which is the thing that actually ruins dinner.
I care about gas grill burner layout: how many tubes, what shape they are, how far apart they sit, and where the heat collects once the lid is down. Get that right and a mid-priced grill will out-cook a showroom monster with a bigger number on the box. Get it wrong and you spend every cook shuffling burgers away from one corner.
This is the method I use before I spend my own money, and it works whether you are shopping a four-burner budget unit or a five-burner with a rotisserie burner on the back.
Why you should trust me
I cooked the line for 15 years before I started running a BBQ judging circuit, which I did for 12 more. I own four grills, a thermometer collection my wife has opinions about, and a spiral notebook that goes back to my first apartment. Every grill I take seriously gets the same three cooks: a dozen burgers for evenness, a full brisket for heat stability, and a whole chicken for flare-ups.
I keep the notes. Ambient temp, wind direction, which corner ran hot, how long the temp took to come back after I opened the lid. Recovery time is the most honest spec in grilling and it appears on exactly zero spec sheets.
I also have a hard rule: no review without at least three full cooks on the unit. So when I talk about two grills below, I will tell you plainly what I have and have not cooked on.
How I picked and how I tested
The two grills here are not a head-to-head taste test. They are the two ends of the layout conversation: a four-burner at the budget tier and a five-burner with a rear burner at the mid-range. Everything I say about them comes from the layout as it reads on paper plus the same checklist I run on any new gas grill in my driveway.
That checklist is short. Where do the burners sit and what shape are the tubes? Can I run one side hot and one side off without the heat creeping across? Is the igniter a real system or an afterthought? What does the burner warranty actually cover, parts or the whole assembly? And would I trust this thing with a brisket that cost me more than the tank of propane under it?
That last question is the real test. A grill that cannot hold 350 for an hour without babysitting is a fire pit with a lid.
What burner layout actually tells you
Burner count is the number people quote and the least informative part of the spec. What matters is geometry.
Most propane grills run their tubes front to back, which means the heat bands run front to back too. That is good news for two-zone cooking, because you can light the left half and leave the right half off, and your sear zone sits next to your indirect zone like it should. Some cheaper cabinets run a single H-shaped burner or a long U, and those tend to pool heat in the middle and leave the corners cool.
Spacing matters as much as shape. Wide gaps between tubes mean the grate directly over a burner runs hot and the grate between two burners runs cooler. That is where flare-ups start, because the fat lands on the hot band and the flame climbs. If you want a predictable cook, you want tubes close enough together that the grate temperature evens out across the surface.
Then there is the rear burner. A rear rotisserie burner is the most underrated feature on a mid-range grill, because it gives you a second heat source above the food instead of below it. You can run it low with the main burners off and get a clean indirect cook with no flare-up risk at all.
Finally, count the side burner and decide whether you will actually use it. A side burner is great for a pot of beans or a skillet of onions. It is dead weight if you never cook anything that needs a pot. My rule is simple: if the side table is smaller than a plate, the side burner does not earn its space.
Two grills that put this layout method to work
These are the two units I would send someone to look at first, one at each end of the budget. Read the layout section above, then read these with the same checklist in your hand.
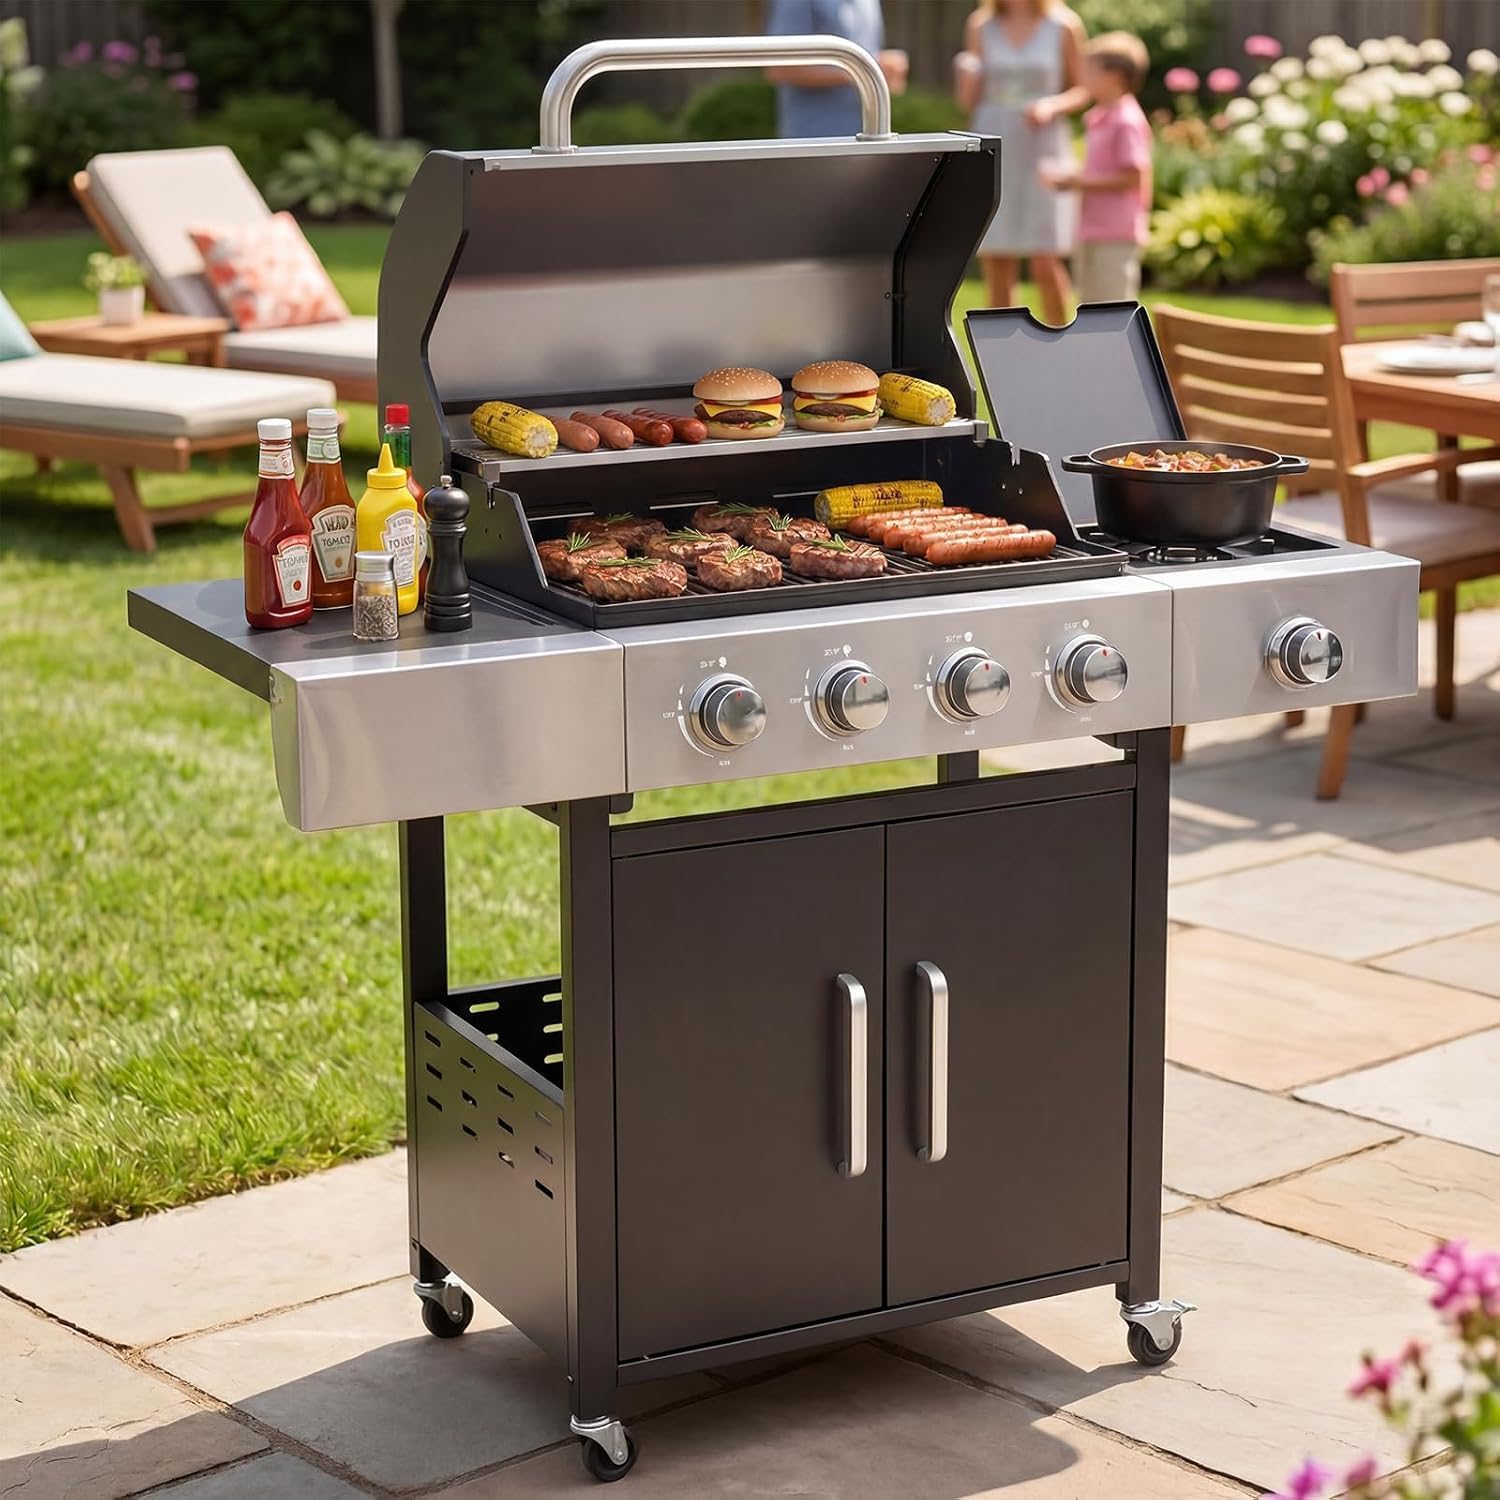
Budget pick: Aoxun 4-Burner 49000 BTU Propane Grill with Side Burner, Black
 Visit on Amazon →
A four-burner propane cabinet with a side burner, in black, rated at 49,000 BTU. I have not cooked a brisket on this one, and I am not going to pretend otherwise. What I can tell you is that a four-burner layout is the right shape for the method in this article: you get enough tubes to run a real two-zone setup, you get a side burner for a pot, and you do not pay for burners you will never light.
Four tubes also means four chances at a hot spot, so the burger test below matters more on a grill like this than on anything expensive. Plan on mapping it before your first real cook.
Flaws but not dealbreakers: At the budget tier, the parts that fail first are the igniter and the thin metal in the firebox, so check both the day it arrives and return it inside the window if the igniter is flaky. Check the burner warranty language before you buy, because a parts-only warranty on a cheap grill is close to no warranty at all.
Buy this if you want four burners and a side burner without spending mid-range money, and you are willing to learn the grill's hot spots in the first week.
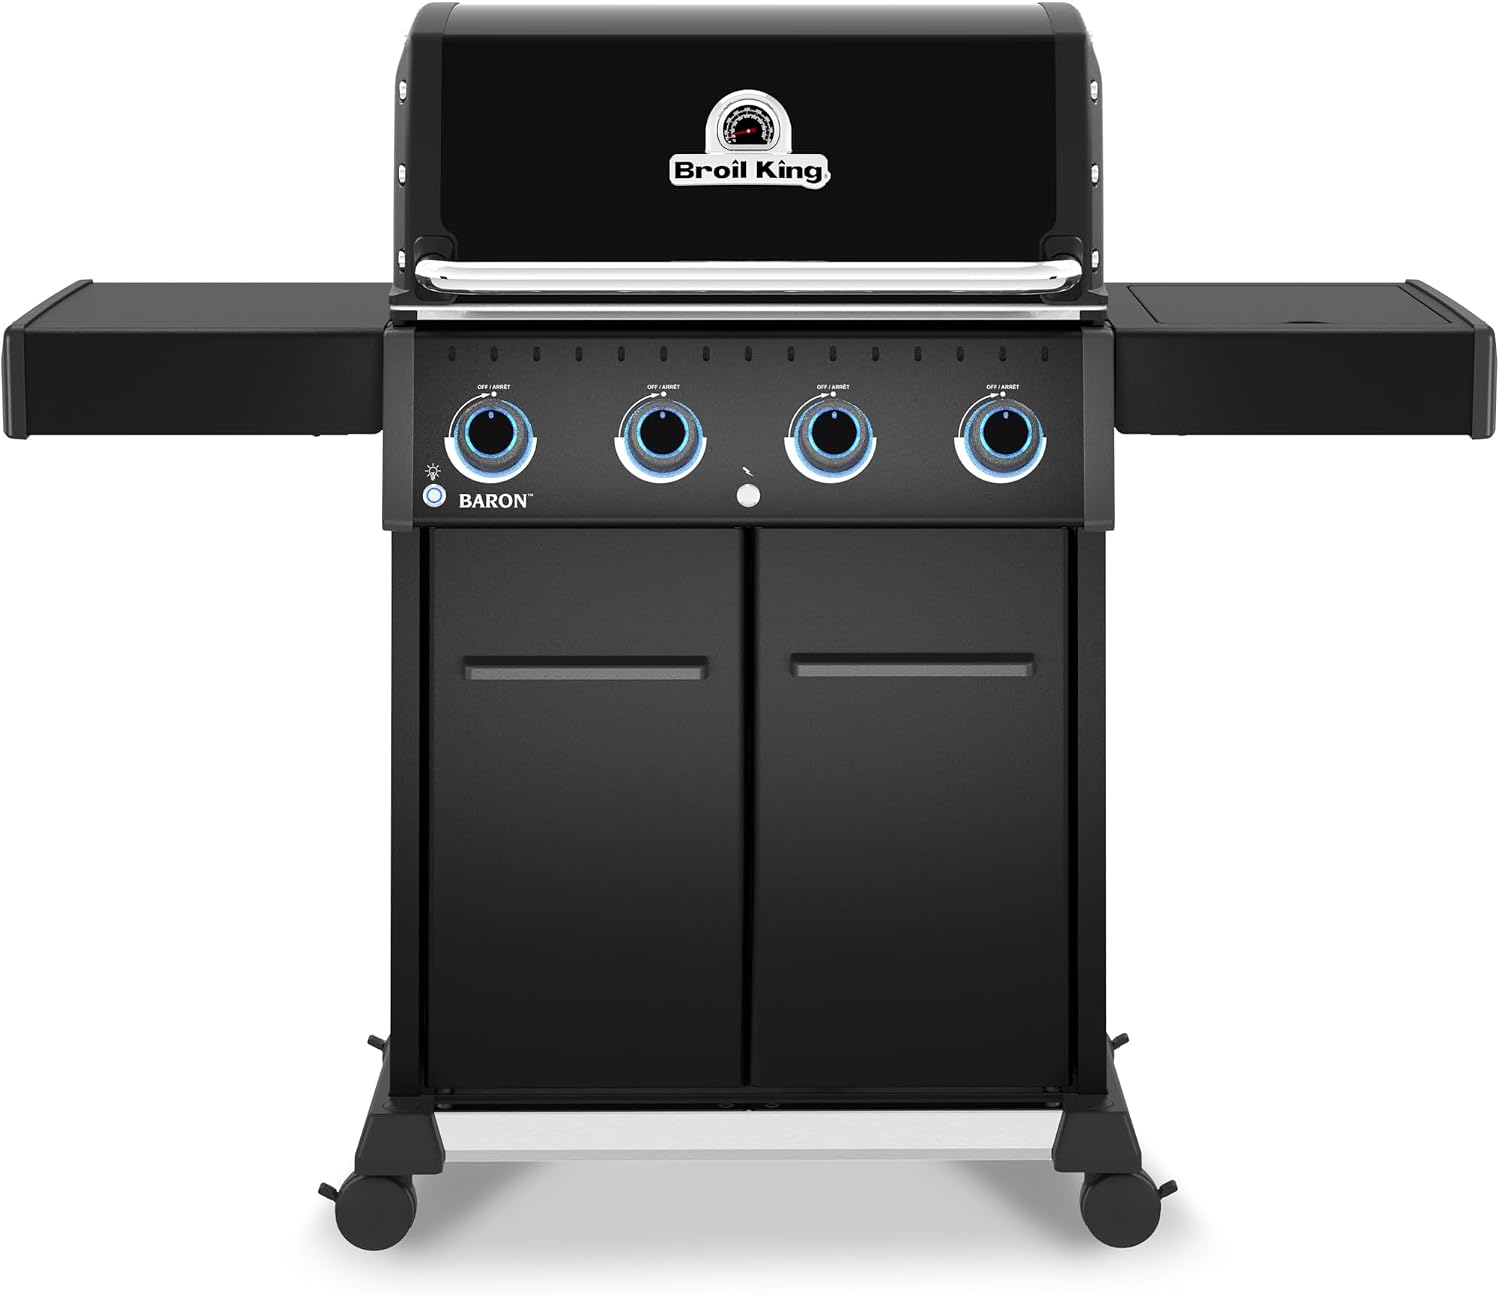
Our pick: Broil King 675144 Baron 590 Pro Shadow 5-Burner Pellet Ready Propane Gas Grill in Black with Side Burner and Rear Rotisserie Burner
 Visit on Amazon →
A five-burner propane grill with a side burner and a rear rotisserie burner, in black. I have said for years that Broil King has the best burner layout in the mid-range and nobody talks about them because they do not pay influencers. This is the layout I mean: five tubes across the cook box, a real rear burner, and a side burner that is not an afterthought.
That rear burner is why this one is my pick. It gives you a top-down heat source for rotisserie chicken or a low indirect cook with the main burners shut off, which is the closest thing to flare-proof cooking a gas grill offers. Five burners also let you build a wider sear zone and still keep a cooler corner for finishing.
Flaws but not dealbreakers: It is heavier and takes longer to assemble than a four-burner cabinet, and a rear burner only pays you back if you will actually use it. If you never spin a chicken, put that money into a better thermometer instead. Check current Amazon price and compare it against the four-burner above before you decide the extra burners are worth it.
Buy this if you cook for a crowd, want a genuine sear zone plus a rear burner, and plan to keep the grill for a decade.
How to set up heat zones on a new gas grill
This is the part that turns either grill above into a tool. Do it once, write it down, and you will never guess again.
Step one: Read the manual for burner orientation. You need to know whether your tubes run front to back or side to side, because that decides which way your zones run. Five minutes here saves a season of confusion.
Step two: Test the igniter before you cook anything. Light every burner individually, then light them in sequence the way you actually will. If any burner needs two or three clicks, or if you have to hold the knob in longer than the manual says, deal with it now while the return window is open. An igniter that dies in the first season is the most common cheap-grill failure and the most annoying.
Step three: Burn it off, then season the grates. Run all burners on high for 15 to 20 minutes with the lid closed to burn off manufacturing oil, then let it cool and oil the grates per the manual. Do not cook your first meal on a factory-fresh grate.
Step four: Map the hot spots with burgers. Buy a dozen identical patties, same thickness, straight from the fridge. Lay them across the entire grate in a grid, light every burner to the same setting, and do not touch them for four minutes. Flip them all at once and look at the color. The patties that are darker are sitting on your hot spots. Note which corner. That corner is where you sear and where you never walk away.
Step five: Build your two zones. Left half on, right half off is the default for a reason. Sear over the lit side, finish over the dark side with the lid down. On the five-burner, you can go further: light the two left tubes, leave the three on the right dark, and you have a sear zone plus a warm holding area.
Step six: Learn the recovery time. Get the grill to 350 with the lid closed, then open it for a full 30 seconds and close it again. Time how long it takes to climb back to 350. That number is your recovery time, and it tells you how the grill behaves when you are cooking eight steaks in two batches. A fast recovery means you can cook in waves. A slow one means you cook fewer things at once and keep the lid shut.
Step seven: Handle flare-ups like a cook, not a firefighter. Trim excess fat before it hits the grate, keep a spray bottle of water nearby for the small flames, and move the food off the hot band instead of standing there watching it burn. On the Broil King, use the rear burner with the mains off when you are cooking something fatty. No fat dripping onto a hot tube means no flare-up.
Step eight: Log it. Ambient temp, wind, which side ran hot, how long the recovery took. Do this for three cooks and you will know your grill better than any review could tell you. I have notebooks going back years and I still write in them.
Caveats that matter more than the spec sheet
BTU numbers bigger than the honesty of the marketing department are a pet peeve of mine, and they are the easiest thing to ignore once you know what to look for. A few other things worth checking before you hand over money.
Side tables smaller than a plate are useless. You need room for a sheet pan and a pair of tongs, not a sauce cup.
"Restaurant-grade" stamped on a budget grill means nothing. Ask what the burner warranty covers instead, because that is the number that shows up in year four when you need a part.
And if the igniter looks like an afterthought in the photos, it probably is. If I have to light a grill with a torch on week three, it is going back.
What this guide is not
This is a gas grill article. If you want a pellet smoker, go read the smoker bench, because that is a different fuel and a different set of skills. Charcoal is its own religion and I respect it, but a kettle does not have burners to lay out, so the method above does not apply.
The same goes for a full outdoor kitchen build or a built-in unit. Different checklist, different guide.
What this all costs
Both grills are propane utilities with a burner layout, and the honest way to price them is cost per cook, not sticker price. Take whatever the listing shows today (check current Amazon price on each) and divide by the number of cooks you will actually do in five years. If you grill twice a week from April through October, that is roughly 300 cooks, and the per-cook math gets small fast on either one.
The four-burner gets you into real two-zone cooking for the least money. The five-burner costs more and buys you a wider sear zone plus a rear burner you will use or you will not. A thermometer you trust costs less than either grill and improves the food more than either upgrade, so budget for one of those too.
The setup itself is free. A dozen patties and an hour on a Saturday is the entire cost of learning your grill's hot spots, and it is the best hour you will spend with the lid up.
That is the job. BTU is marketing. Layout is engineering. Go find out which side of your grate runs hot, then cook like you already knew.